What is the typical diameter of 21 degree ring shank nails?

The typical diameter of 21-degree ring shank nails can vary depending on the specific manufacturer and the intended application. However, in general, 21-degree ring shank nails commonly have diameters ranging from approximately 0.113 inches to 0.148 inches (or approximately 2.87mm to 3.76mm).

It’s essential to note that the diameter of the nail affects its holding power and suitability for different types of materials and projects. Smaller diameter nails may be suitable for lighter framing or trim work, 21 degree ring shank nails  while larger diameter nails are typically used for heavier framing and structural applications.

When selecting 21-degree ring shank nails, be sure to choose the appropriate diameter based on the requirements of your project, the thickness of the materials being fastened, and any specific building codes or standards that may apply. Additionally, always refer to the manufacturer’s specifications and recommendations for the nails you plan to use.

How do you choose the appropriate nail gun for driving 21 degree galvanized framing nails?

Choosing the appropriate nail gun for driving 21-degree galvanized framing nails involves considering several factors to ensure compatibility, efficiency, and reliability.

Here’s a step-by-step guide to help you select the right nail gun for your needs:

  1. Nail Size and Type: Verify that the nail gun is compatible with 21-degree galvanized framing nails. Check the nail gun’s specifications to ensure it can accommodate the length and diameter of the nails you plan to use.
  2. Collation Type: Confirm that the nail gun is designed for use with plastic collated nails. The collation type (plastic, paper, wire) must match the type of collation used in 21-degree galvanized framing nails to ensure proper feeding and firing.
  3. Operating Pressure: Check the operating pressure range of the nail gun and ensure it matches the pressure requirements specified for driving 21-degree galvanized framing nails. Adjust the compressor settings accordingly to achieve the recommended operating pressure.
  4. Depth Adjustment: Look for a nail gun with adjustable depth settings to control the depth of nail penetration into the workpiece. 21 degree galvanized framing nails This feature allows you to customize nail depth based on the material and application, ensuring proper fastening without overdriving or underdriving the nails.
  5. Magazine Capacity: Consider the magazine capacity of the nail gun, which determines the number of nails it can hold before reloading. Choose a nail gun with a magazine capacity suitable for your project size and productivity requirements to minimize downtime for reloading.
  6. Trigger Mechanism: Select a nail gun with a trigger mechanism that matches your preference and comfort level. Common trigger options include sequential firing (one nail per trigger pull) and bump or contact firing (continuous rapid firing while the trigger is held).
  7. Durability and Ergonomics: Look for a nail gun with a durable and ergonomic design that enhances comfort, control, and ease of use during prolonged use. Features such as rubberized grips, adjustable handles, and lightweight construction can reduce user fatigue and improve productivity.
  8. Brand Reputation and Warranty: Choose a nail gun from a reputable manufacturer known for producing high-quality pneumatic tools. Check customer reviews, ratings, and testimonials to gauge the reliability and performance of the nail gun. Additionally, consider the warranty coverage and customer support provided by the manufacturer.
  9. Budget Considerations: Evaluate your budget and choose a nail gun that offers the best combination of features, performance, and value within your price range. Compare prices from different brands and retailers to find a nail gun that meets your requirements without exceeding your budget.
  10. Compatibility with Accessories: Determine if the nail gun is compatible with accessories such as interchangeable nosepieces, belt hooks, or tool-free jam clearing mechanisms. These accessories can enhance versatility, convenience, and functionality in various applications.

By considering these factors and conducting thorough research, you can choose the appropriate nail gun for driving 21-degree galvanized framing nails that meets your specific requirements and preferences. It’s essential to prioritize safety, reliability, and compatibility to achieve optimal results in your framing projects.

What Is Double Weave Fabric?

Double weave fabric is a type of advanced weave made by interlacing two or more sets of warp yarns with two or more sets of filling yarns. Typically, four or five sets of yarn are used. The yarns are stitched together by weaving one on top of the other.

Warp threads are the vertical threads that run lengthwise on the loom, while weft threads are the horizontal threads that run across the loom. The interlacing of these two types of threads is what creates the unique look and feel of the double-weave fabric.

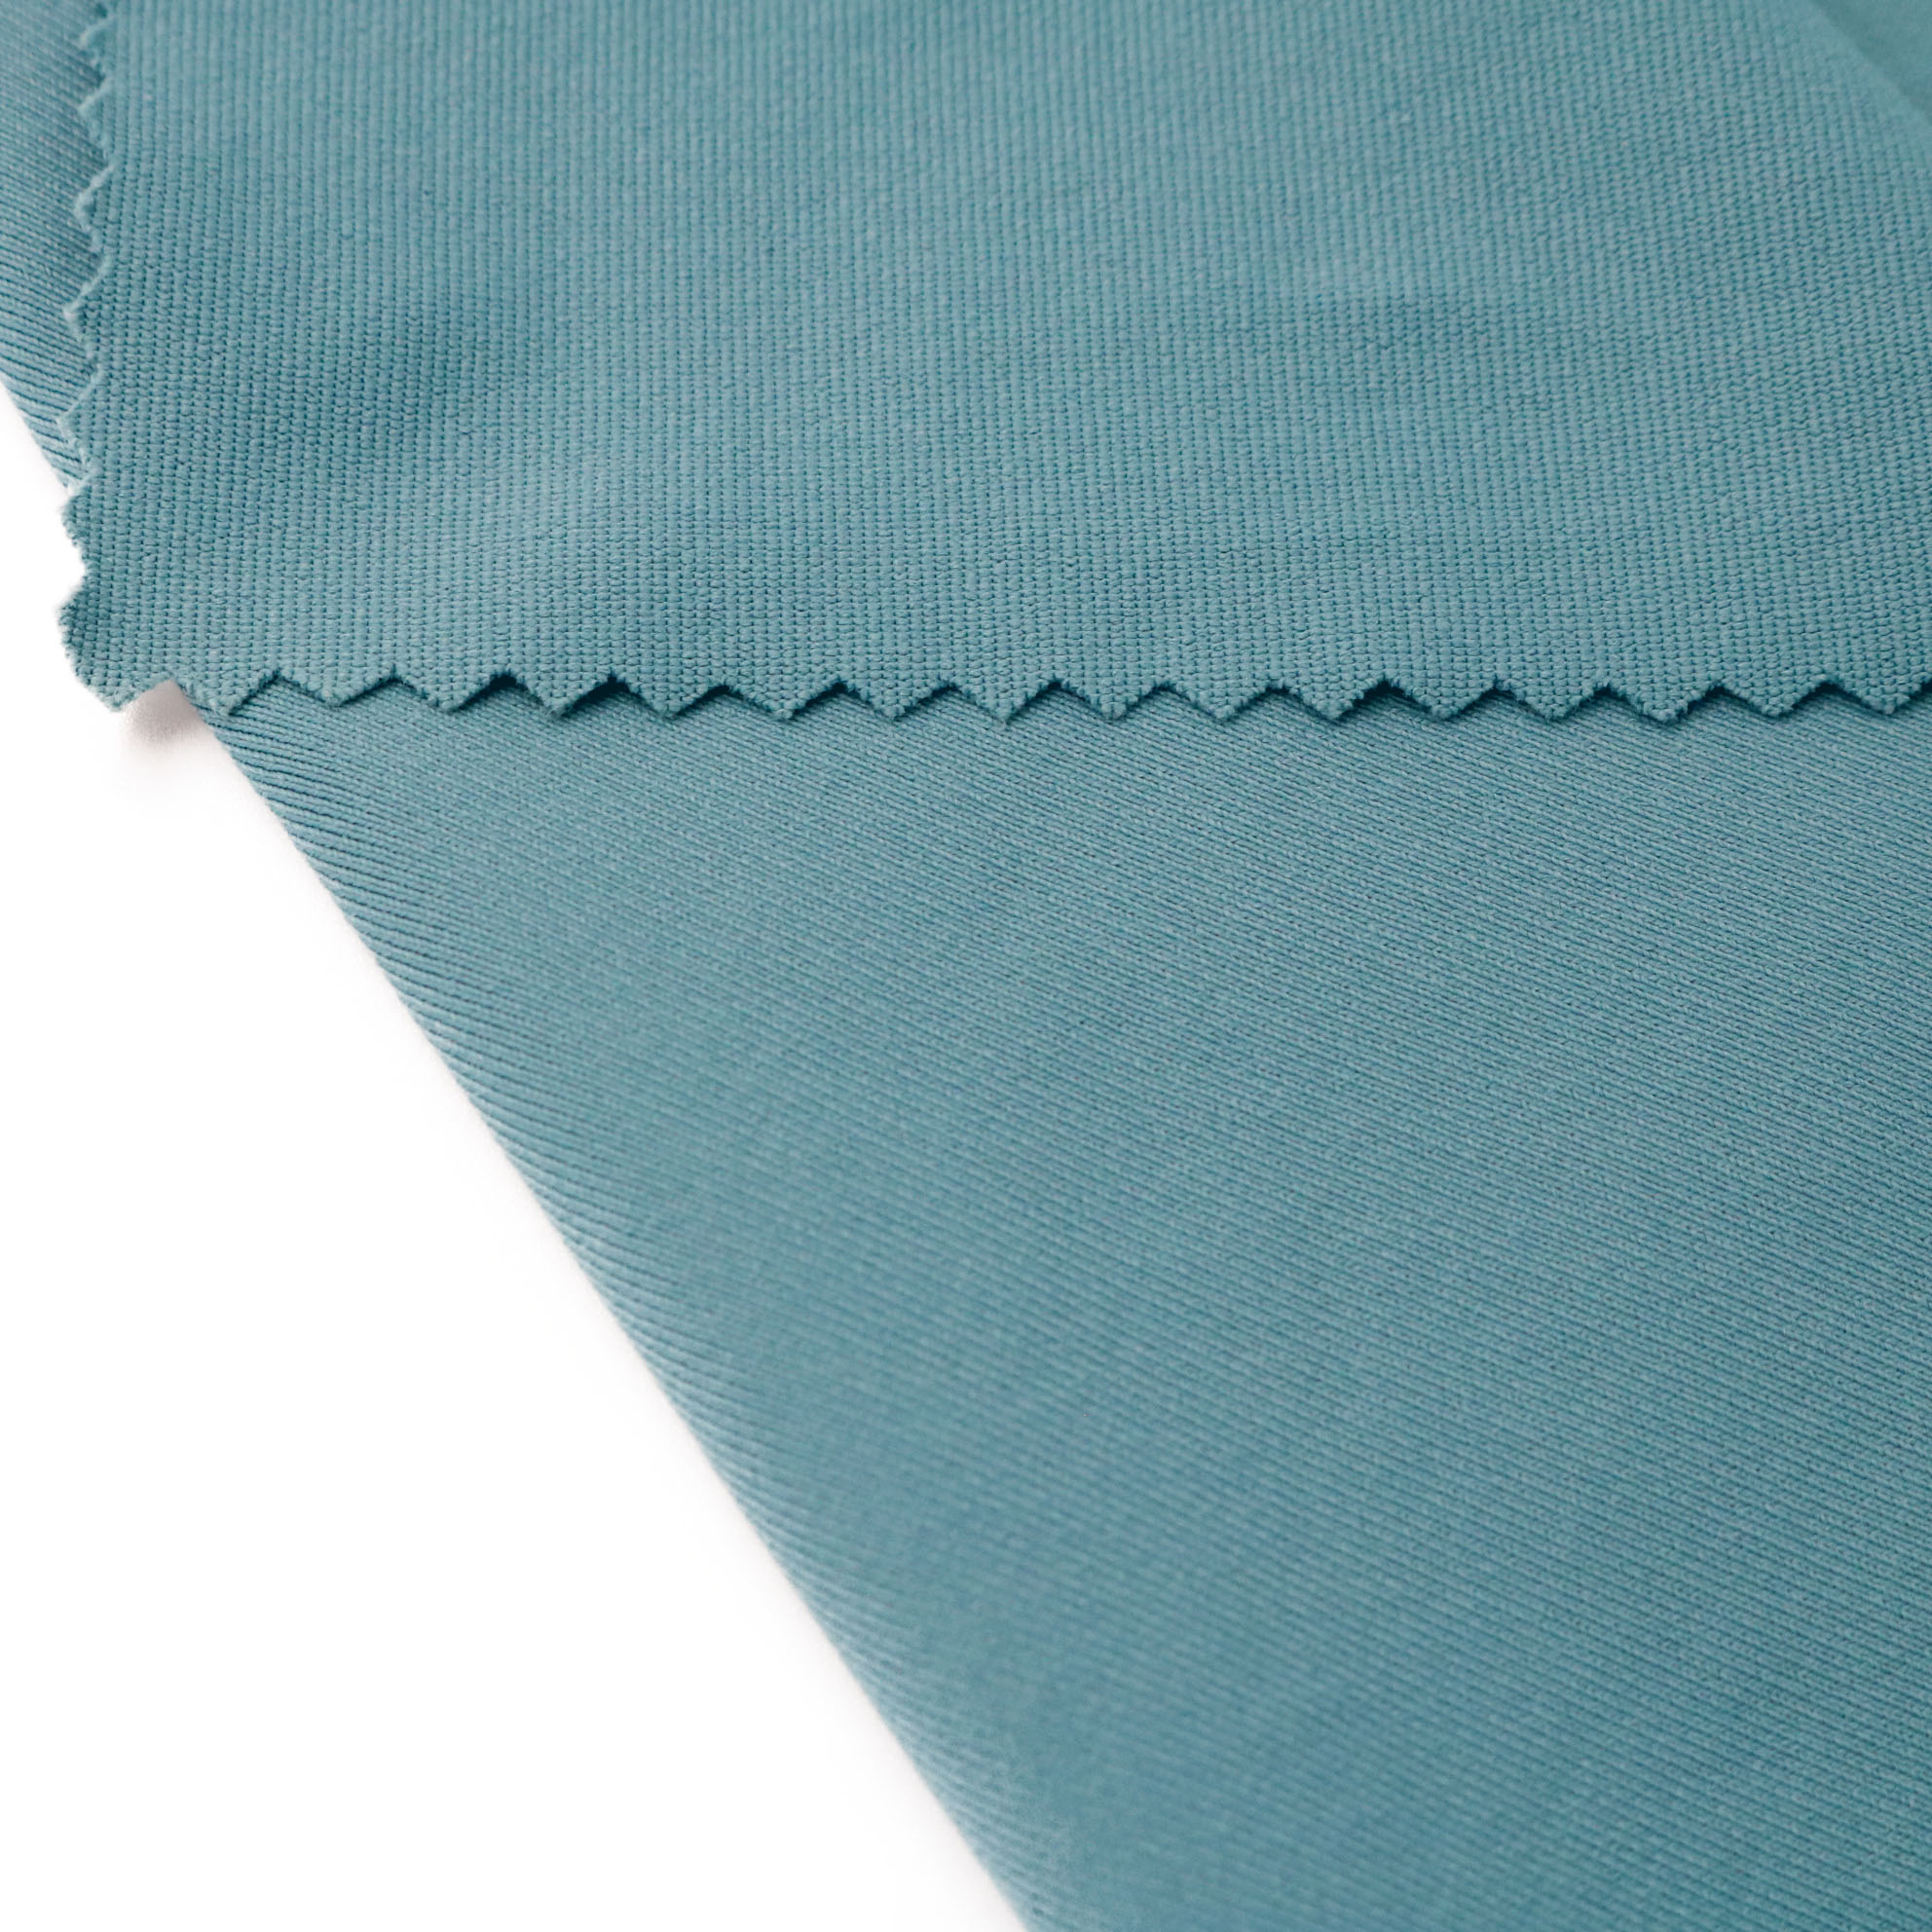
Characteristics of Double Weave Materials

Double-weave fabrics are usually made with cotton. Double weave fabric is a durable and versatile textile ideal for various uses.

When a double-weave fabric is washed, the cotton fibers expand and soften, giving the fabric a worn-in look. Here are the general characteristics of double-weave fabric:

  • Generally thick
  • Somewhat sheer
  • Heavy
  • Invertible
  • Warm
  • Interlaced

Types of double-weave fabrics

  • Double cloth

This type of double-weave fabric is created by interlacing two distinct layers of cloth with the same set of warp and weft threads. Regular connections between the layers create a grid-like pattern or a collection of interrelated motifs.

  • Tube Weave 

Tube weave is a type of double weave that involves weaving the upper and lower layers as separate tubes, which are then joined to create a double-layered fabric. This method is frequently used for cylindrical or tubular materials, such as sleeves or legs of clothing.

  • Back-to-Back Weave

This technique creates varied fabrics with different patterns, colors, or textures on the front and back. It is frequently used for reversible fabrics or products that display both sides.

How are Double Weave Fabrics Made

Weaving is a complicated and rigorous process. It involves winding two strands of yarn or thread around each other to create the fabric. Double weaving, as the name suggests, involves creating two or more threads together.

Process of creating double weave fabric

The process begins with two or more threads twisting together to form the foundation for weaving, creating the warp. The weft, made up of threads interwoven with the warp threads, is then used to weave the fabric.

To simplify the process:

  1. The warp threads are arranged first in a specific pattern that will create the fabric.
  2. The weft threads are passed through the warp threads and then woven into the fabric.
  3. Lastly, the cloth is finished with the type or choice of border or trimming.

The process depends on the type of technique and equipment used. It is the same as any other type of weaving, with added steps to create its invertibility feature.

Shuttle Looms used to make double-weave fabrics

The shuttle loom weaves multiple layers of fabric to create intricate designs that are both beautiful and practical. This loom has greatly improved efficiency in textile production, resulting in increased output and more affordable prices. As a result, loom technology has played a significant role in shaping our world today.

The weft yarn is shuttled through the back-and-forth motion of the warp on this all-purpose loom. However, it has some significant issues such as noise and vibration, making it challenging to operate at high speeds.

Techniques Used To Create Different Patterns

Double weave fabric is a versatile textile that can create a variety of patterns and textures by interlacing two separate layers of fabric together. Several techniques can be used to create different patterns. Here are a few examples:

  • One common technique is to use a different color for each layer, creating a fabric with a distinct color on each side. This allows for the creation of a reversible garment.
  • Another technique involves weaving fabric in layers to create a pattern, such as stripes or checks, that appears on one side but not the other. This is accomplished by making one layer denser than the other.
  • It is possible to create double-weave fabric with pockets. This is achieved by weaving pockets into one layer of fabric, and then weaving the other layer on top. The result is a fabric with pockets on one side and a smooth surface on the other.

Uses of Double Weave Fabric

  • Clothing

The most popular application of double-weave fabric is in the fashion industry. They are quite popular in making jackets, coats, and the like.

  • Home Decorations

Double-weave fabrics are also popular for home decorations. Used on couches as covers, and even floor carpets. Its thickness and comfort are the reasons for this.

  • Industrial Applications

Its thermal resistance makes it a preferred choice in industrial fields.

Pros and Cons of Double Weave Fabric

Double weave fabric is a durable type of fabric woven on a double-layered loom. It is ideal for items like upholstery, bags, and winter clothing. However, it can also be heavy and difficult to work with, making it challenging for beginners or those who are not experienced with sewing.

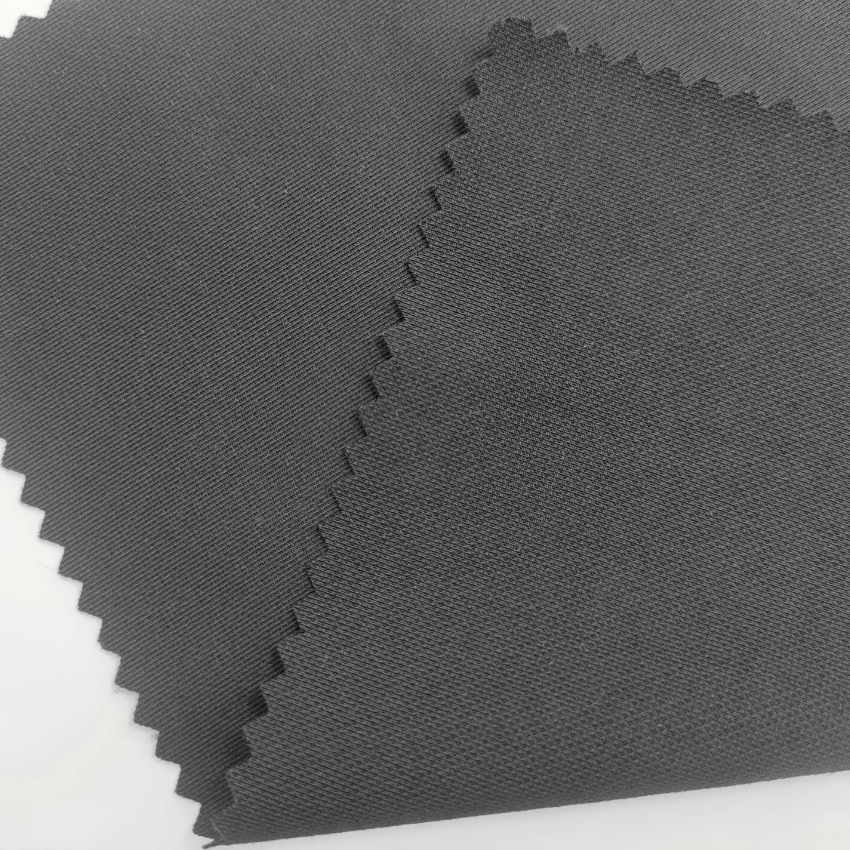
Double-weave textiles are typically thick and robust. There is no right or wrong side, so it can be used from either.

Double-weave fabrics may not be suitable for everyone as some people may be allergic to their materials. Additionally, since it is manufactured using special materials, it can be quite expensive, which affects both its production and price.

Due to its thickness and texture, double-weave textiles easily accumulate dust and dirt. Therefore, it requires thorough cleaning.

Overall, double-weave fabrics are a versatile option to consider for various purposes.

Conclusion

Double weave fabric is an advanced weave with complex construction. It utilizes at least two sets of warps and two sets of weft to create two textiles, one on top of the other.

Double weave fabric is a versatile material that is ideal for designing a wide variety of stylish and functional fashion items. Whether creating a winter coat or a summer dress.

How does Wool Fabric compare to rayon in terms of production process?

Wool fabric and rayon (viscose) fabric are produced using vastly different processes due to their distinct raw materials and fiber compositions.

Here’s a comparison of the production processes for wool fabric and rayon fabric:

Wool Fabric Production Process:

  1. Shearing: Wool fabric begins with the shearing of wool from sheep or other wool-bearing animals such as goats (cashmere and mohair) or rabbits (angora).
  2. Scouring: The raw wool is then washed to remove impurities such as dirt, grease, and lanolin. This process is known as scouring and is typically done using water and mild detergent.
  3. Carding: The clean wool fibers are carded, which involves aligning and separating the fibers to create a uniform web or sliver of wool.
  4. Spinning: The carded wool fibers are spun into yarn using spinning machines. This process twists the fibers together to create yarns of varying thickness and strength.
  5. Weaving or Knitting: The wool yarns are then woven or knitted into fabric on looms or knitting machines, depending on the desired fabric construction.
  6. Finishing: After weaving or knitting, the wool fabric may undergo various finishing processes such as washing, dyeing, China Wool Fabric factory   and/or pressing to enhance its appearance, texture, and performance characteristics.

Rayon (Viscose) Fabric Production Process:

  1. Cellulose Extraction: Rayon, also known as viscose, is a semi-synthetic fiber made from regenerated cellulose. The production process begins with the extraction of cellulose from natural sources such as wood pulp or bamboo through chemical or mechanical means.
  2. Pulping: The extracted cellulose is then pulped or dissolved in a solvent to break down the fibers into a viscous liquid known as viscose.
  3. Extrusion: The viscose solution is extruded through spinnerets (small holes) into a coagulating bath, typically containing sulfuric acid or another acidic solution. This process solidifies the viscose solution into long filaments of regenerated cellulose.
  4. Spinning: The solidified filaments are washed to remove residual chemicals and then spun into yarn using spinning machines.
  5. Weaving or Knitting: The rayon yarns are woven or knitted into fabric on looms or knitting machines, similar to the process used for wool fabric.
  6. Finishing: After weaving or knitting, the rayon fabric undergoes finishing processes such as washing, dyeing, and/or pressing to achieve the desired appearance, texture, and performance properties.

In summary, the production process for wool fabric involves shearing, scouring, carding, spinning, weaving or knitting, and finishing of natural wool fibers. In contrast, the production process for rayon (viscose) fabric involves cellulose extraction, pulping, extrusion, spinning, weaving or knitting, and finishing of regenerated cellulose fibers derived from natural sources. While wool fabric is made from natural animal fibers, rayon fabric is a semi-synthetic fiber produced from natural cellulose sources using chemical processing.

What are the antimicrobial properties of Viscose Fabric?

Viscose fabric itself does not inherently possess antimicrobial properties. Viscose, also known as rayon, is a semi-synthetic fiber made from regenerated cellulose, typically derived from wood pulp or bamboo.

While viscose fabric does not have natural antimicrobial properties like some other fibers such as wool or bamboo, it can still offer benefits in certain situations:

  1. Moisture Absorption: Viscose fabric has good moisture absorption properties, which can help keep the skin dry and reduce the growth of microbes that thrive in moist environments. By wicking moisture away from the body, viscose fabric may create a less favorable environment for microbial growth.
  2. Breathability: Viscose fabric is breathable, allowing air to circulate freely through the fabric. Improved air circulation can help prevent the buildup of moisture and sweat on the skin, which in turn may inhibit the growth of odor-causing bacteria.
  3. Ease of Cleaning: Viscose fabric is generally easy to clean and can withstand washing at moderate temperatures. Proper laundering can help remove dirt, oils, and microbes from the fabric, China Viscose Fabric factory  reducing the risk of microbial growth and odor buildup.
  4. Compatibility with Antimicrobial Treatments: While viscose fabric itself does not possess antimicrobial properties, it can be treated with antimicrobial finishes or coatings during the manufacturing process. These treatments can impart antimicrobial properties to the fabric, inhibiting the growth of bacteria, fungi, and other microbes.
  5. Blend with Antimicrobial Fibers: Viscose fabric can be blended with other fibers that have inherent antimicrobial properties, such as bamboo or silver-infused fibers. Blending viscose with these antimicrobial fibers can enhance the overall antimicrobial performance of the fabric while retaining the softness and drape of viscose.

It’s important to note that the antimicrobial effectiveness of viscose fabric, whether through treatments or blending with antimicrobial fibers, may vary depending on the specific treatment methods used and the concentration of antimicrobial agents applied. Additionally, regular laundering and proper care are still necessary to maintain the cleanliness and hygiene of viscose garments.

4 Inch Steel Pipe Fittings: The Ultimate Guide

This article provides an overview of 4 inch steel pipe fittings, including their types, applications, and benefits. We will explore the different types of 4 inch steel pipe fittings available, their uses in various industries, and the advantages they offer.

Steel pipe fittings are an essential part of any piping system, and 4 inch steel pipe fittings are no exception. They are used to connect and control the flow of fluids, gases, and slurries in various industries, including oil and gas, chemical processing, water treatment, and more.

In this article, we will provide an in-depth guide to 4 inch steel pipe fittings, including their types, applications, and benefits.

4 Inch Steel Pipe Fittings

Types of 4 Inch Steel Pipe Fittings

4 inch steel pipe fittings come in a variety of shapes and sizes, each with its unique purpose. Some of the most common types of 4 inch steel pipe fittings include:

Elbows: Used to change the direction of the pipe by 90 degrees or 180 degrees.

Tees: Used to connect two pipes at a 90-degree angle.

Couplings: Used to connect two pipes.

Unions: Used to connect two pipes, allowing for easy disconnection.

Valves: Used to control the flow of fluids, gases, and slurries.

Applications of 4 Inch Steel Pipe Fittings

4 inch steel pipe fittings are used in a variety of industries, including:

Oil and gas: 4 inch steel pipe fittings are used in the production, transportation, and refining of oil and gas.

Chemical processing: 4 inch steel pipe fittings are used to transport and control the flow of chemicals in chemical processing plants.

Water treatment: 4 inch steel pipe fittings are used in water treatment plants to transport and control the flow of water.

Mining: 4 inch steel pipe fittings are used in mining operations to transport and control the flow of slurries.

4 Inch Steel Pipe Fittings

Benefits of 4 Inch Steel Pipe Fittings

4 inch steel pipe fittings offer several benefits, including:

Durability: 4 inch steel pipe fittings are made from high-quality steel, making them durable and resistant to corrosion.

Strength: 4 inch steel pipe fittings are designed to withstand high pressures and temperatures.

Versatility: 4 inch steel pipe fittings come in a variety of shapes and sizes, making them versatile and easy to use in a variety of applications.

Cost-effectiveness: 4 inch steel pipe fittings are cost-effective and offer a long-term solution for piping systems.

Conclusion

4 inch steel pipe fittings are an essential part of any piping system, offering durability, strength, versatility, and cost-effectiveness. With their wide range of applications and benefits, 4 inch steel pipe fittings are a must-have for any industry that involves the transportation and control of fluids, gases, and slurries.

Whether you’re in the oil and gas industry, chemical processing, water treatment, or mining, 4 inch steel pipe fittings are the perfect solution for your piping needs.

How do you connect non threaded pipe coupling to PEX pipe?

In this article, we’ll explore the best ways to connect non threaded pipe couplings to PEX pipes, ensuring a watertight seal and reliable performance.

Connecting Non Threaded Pipe Couplings to PEX Pipes

Before we dive into the solutions, let’s first understand why connecting non-threaded pipe couplings to PEX pipes can be a challenge.

PEX pipes are made of a flexible material that can expand and contract with temperature changes, while non-threaded pipe couplings are rigid and don’t have the same level of flexibility.

This difference in material properties can make it difficult to create a secure connection between the two.

Non Threaded Pipe Couplings

Solutions for Connecting Non-Threaded Pipe Couplings to PEX Pipes

There are several ways to connect non-threaded pipe couplings to PEX pipes, each with its own set of benefits and drawbacks. Here are some of the most common solutions:

Using a PEX-to-non-threaded pipe coupling adapter: These adapters are designed specifically for connecting PEX pipes to non-threaded pipe couplings.

They have a smooth, rounded surface that fits snugly onto the PEX pipe, and a non-threaded end that can be inserted into the non-threaded pipe coupling. This is a simple and effective solution that ensures a watertight seal.

Wrapping the non-threaded pipe coupling with a PEX pipe sleeve: A PEX pipe sleeve can be wrapped around the non-threaded pipe coupling to create a smooth, flexible surface that can be easily connected to the PEX pipe.

This method is a bit more time-consuming, but it can be a good option if you don’t have access to a PEX-to-non-threaded pipe coupling adapter.

Using a PEX pipe clamp: A PEX pipe clamp can be used to secure the PEX pipe to the non-threaded pipe coupling. The clamp is placed around the PEX pipe and the non-threaded pipe coupling and tightened to create a secure connection. This method is a bit more invasive, but it can be a good option if you’re working with limited space.

Tips for Connecting Non-Threaded Pipe Couplings to PEX Pipes

Here are some tips to keep in mind when connecting non-threaded pipe couplings to PEX pipes:

Use the correct size of PEX pipe: Make sure you’re using the correct size of PEX pipe for the job. Using a PEX pipe that’s too small can result in a loose connection while using a PEX pipe that’s too large can be difficult to connect.

Non Threaded Pipe Couplings

Clean the surface of the PEX pipe: Before connecting the PEX pipe to the non-threaded pipe coupling, make sure the surface of the PEX pipe is clean and free of debris. This will ensure a smooth, secure connection.

Use the correct amount of force: When connecting the PEX pipe to the non-threaded pipe coupling, use the correct amount of force. Too much force can damage the PEX pipe, while too little force can result in a loose connection.

Test the connection: Once the connection is made, test it by running water through the pipe. Check for any leaks or signs of a loose connection, and make adjustments as needed.

Conclusion:

Connecting non-threaded pipe couplings to PEX pipes can be a challenge, but with the right solutions and techniques, it can be done easily and effectively.

By using a PEX-to-non-threaded pipe coupling adapter, wrapping the non-threaded pipe coupling with a PEX pipe sleeve, or using a PEX pipe clamp, you can create a secure connection that ensures a watertight seal.

Remember to use the correct size of PEX pipe, clean the surface of the PEX pipe, use the correct amount of force, and test the connection to ensure a successful installation.

What is the recommended drying time for sacai shoes after cleaning?

The recommended drying time for Sacai shoes, or any shoes for that matter, after cleaning can vary depending on several factors, such as the extent of cleaning, the materials used in the shoes, and the ambient humidity and temperature. However, as a general guideline, you should allow your Sacai shoes to air dry naturally for at least 24 to 48 hours.

Here are some factors to consider:

  1. Extent of Cleaning: If you’ve given your Sacai shoes a light cleaning to remove surface dirt, they may dry more quickly compared to a deep cleaning that involves scrubbing and washing the shoes thoroughly.
  2. Materials Used: Different materials dry at different rates. For example, shoes with leather uppers may take longer to dry compared to shoes with mesh or knit uppers. Additionally, shoes with thicker or denser materials may retain moisture for longer periods.
  3. Ambient Conditions: The humidity and temperature of the environment can also affect drying time. Shoes will dry more quickly in a warm, dry environment with good air circulation compared to a cold, damp environment.

To ensure that your Sacai shoes dry completely and prevent any potential issues like mold or mildew growth, it’s best to err on the side of caution and allow them to air dry for at least 24 to 48 hours. You can speed up the drying process by placing them in a well-ventilated area with good air circulation, but avoid using heat sources like hairdryers or heaters, as excessive heat can damage the materials of the shoes. Additionally, avoid wearing your shoes until they are completely dry to prevent discomfort and potential damage to the shoes.

How can I prevent mold or mildew from forming on jordan 1 low team red shoes during storage?

To prevent mold or mildew from forming on your Jordan 1 Low Team Red shoes during storage, follow these tips:

  1. Ensure Proper Ventilation: Store your shoes in a well-ventilated area with good air circulation. Avoid storing them in enclosed spaces such as plastic bags or airtight containers, as this can trap moisture and promote mold growth.
  2. Keep Them Dry: Before storing your shoes, make sure they are completely dry. If they are damp or sweaty after wearing them, allow them to air dry thoroughly before putting them away. jordan 1 low team red  You can also place them in front of a fan to speed up the drying process.
  3. Use Moisture Absorbers: Place moisture-absorbing products such as silica gel packs or activated charcoal inside the storage area with your shoes. These products help absorb excess moisture from the air, reducing the risk of mold or mildew growth.
  4. Avoid Humid Areas: Store your shoes in a cool, dry area away from sources of humidity, such as basements, bathrooms, or areas prone to moisture buildup. High humidity levels can create an ideal environment for mold and mildew to thrive.
  5. Clean Regularly: Keep your shoes clean and free of dirt or organic matter, as these can provide nutrients for mold and mildew growth. Regularly wipe down your shoes with a clean, dry cloth to remove any surface moisture or debris.
  6. Rotate Shoes: Rotate your shoes regularly to prevent them from sitting in one place for extended periods. This allows air to circulate around the shoes and helps prevent moisture buildup.
  7. Inspect Regularly: Periodically check your shoes for any signs of mold or mildew, such as musty odors or visible spots. If you notice any signs of mold or mildew, take immediate action to clean and disinfect the affected area.
  8. Sunlight Exposure: Occasionally, expose your shoes to sunlight for a few hours. UV rays can help kill mold spores and prevent their growth. However, be cautious not to expose them to direct sunlight for too long, as it can cause fading or damage to certain materials.

By following these tips, you can help prevent mold or mildew from forming on your Jordan 1 Low Team Red shoes during storage and keep them in good condition for longer.

How can I maintain the shape of team red jordan 1 low shoes while cleaning them?

To maintain the shape of your Team Red Jordan 1 Low shoes while cleaning them, you can follow these steps:

  1. Remove Laces and Inserts: Before cleaning your shoes, remove the laces and any inserts or insoles. team red jordan 1 low  This allows you to clean the shoes more thoroughly and ensures that the laces and inserts maintain their shape.
  2. Stuff with Towels or Paper: Stuff the shoes with clean towels, paper towels, or crumpled newspaper to help them retain their shape while cleaning. Make sure to fill the shoes completely, including the toe box and any other areas that may lose their shape during cleaning.
  3. Use a Soft Brush or Cloth: When cleaning the shoes, use a soft-bristled brush or cloth to gently scrub away dirt and stains. Avoid using harsh brushes or scrubbing too vigorously, as this can damage the material and affect the shape of the shoes.
  4. Spot Clean: Focus on spot cleaning specific areas of the shoes rather than submerging them entirely in water. This helps minimize the risk of water damage and ensures that the shoes maintain their shape throughout the cleaning process.
  5. Air Dry: After cleaning, allow the shoes to air dry naturally in a well-ventilated area. Avoid using heat sources such as hairdryers or heaters, as excessive heat can cause the materials to warp or shrink, affecting the shape of the shoes.
  6. Re-Shape if Necessary: Once the shoes are dry, gently reshape them by hand if needed. Use your fingers to smooth out any wrinkles or creases and reshape the toe box and other areas as necessary.
  7. Store Properly: Store your clean and dry shoes in a cool, dry place away from direct sunlight and heat sources. air jordan 1 low team red  Avoid storing them in cramped spaces or under heavy objects that could deform their shape.

By following these steps, you can help maintain the shape of your Team Red Jordan 1 Low shoes while cleaning them and ensure that they look their best for longer.

What is Black Iron Tee Fitting Used for?

Black iron tee fitting is a type of pipe fitting used in various industries, including plumbing, HVAC, and gas transmission. In this article, we will explore the uses and benefits of black iron tee fittings, as well as their features and specifications.

Black Iron Tee Fitting – A Comprehensive Guide

What is Black Iron Tee Fitting?

A black iron tee fitting is a type of pipe fitting that is used to connect pipes at a 90-degree angle. It is made of black iron, which is a type of steel alloy that is strong and durable. The tee fitting has a T-shaped design, with two outlets on either side of the main pipe.

This design allows for easy connection of pipes of different sizes and shapes, making it a versatile solution for a variety of applications.

Black Iron Tee Fitting

Uses of Black Iron Tee Fitting

Black iron tee fittings are commonly used in a variety of industries, including:

  1. Plumbing: Black iron tee fittings are used to connect pipes in plumbing systems, such as water supply lines, drainage lines, and gas lines.
  2. HVAC: Black iron tee fittings are used to connect pipes in heating, ventilation, and air conditioning systems, such as ductwork and piping for air handling units.
  3. Gas Transmission: Black iron tee fittings are used to connect pipes in gas transmission systems, such as natural gas pipelines and propane distribution systems.

Benefits of Black Iron Tee Fitting

Black iron tee fittings offer several benefits, including:

  1. Durability: Black iron tee fittings are made of high-quality steel that is strong and durable, ensuring a long lifespan and resistance to corrosion.
  2. Versatility: Black iron tee fittings can be used to connect pipes of different sizes and shapes, making them a versatile solution for a variety of applications.
  3. Easy Installation: Black iron tee fittings are easy to install, requiring minimal tools and expertise.
  4. Cost-Effective: Black iron tee fittings are a cost-effective solution for connecting pipes, as they are relatively inexpensive compared to other types of pipe fittings.

Black Iron Tee Fitting

Features and Specifications

Black iron tee fittings come in a variety of sizes and specifications, including:

  1. Size: Black iron tee fittings are available in a range of sizes, from 1/2 inch to 24 inches.
  2. Thickness: Black iron tee fittings are available in various thicknesses, including schedule 40, schedule 80, and schedule 160.
  3. Material: Black iron tee fittings are made of high-quality steel, such as ASTM A53 or ASTM A106.
  4. Connection: Black iron tee fittings can be connected using various methods, including welding, threading, and compression fittings.

Conclusion

Black iron tee fittings are a versatile and cost-effective solution for connecting pipes in various industries. Their durability, versatility, and ease of installation make them a popular choice among professionals.

When selecting a black iron tee fitting, it is important to consider the size, thickness, material, and connection method to ensure a proper fit and long lifespan. By understanding the benefits and features of black iron tee fittings, professionals can make informed decisions and ensure the success of their projects.